
iPhone eSIM Installation
Before You Start
- Supported models: iPhone XS / XR or later (iPhone 14 US models are eSIM-only)
- Device must be carrier-unlocked
- Wi-Fi or mobile data connection
- Latest iOS version recommended
- The QR code or activation info received after your esimoa purchase
💡 Install 24 hours before departure and activate after arrival.
Method 1. Activation Link (Fastest)
The fastest path — tap the link in the activation email/SMS from esimoa.
Step 1. Tap the activation link
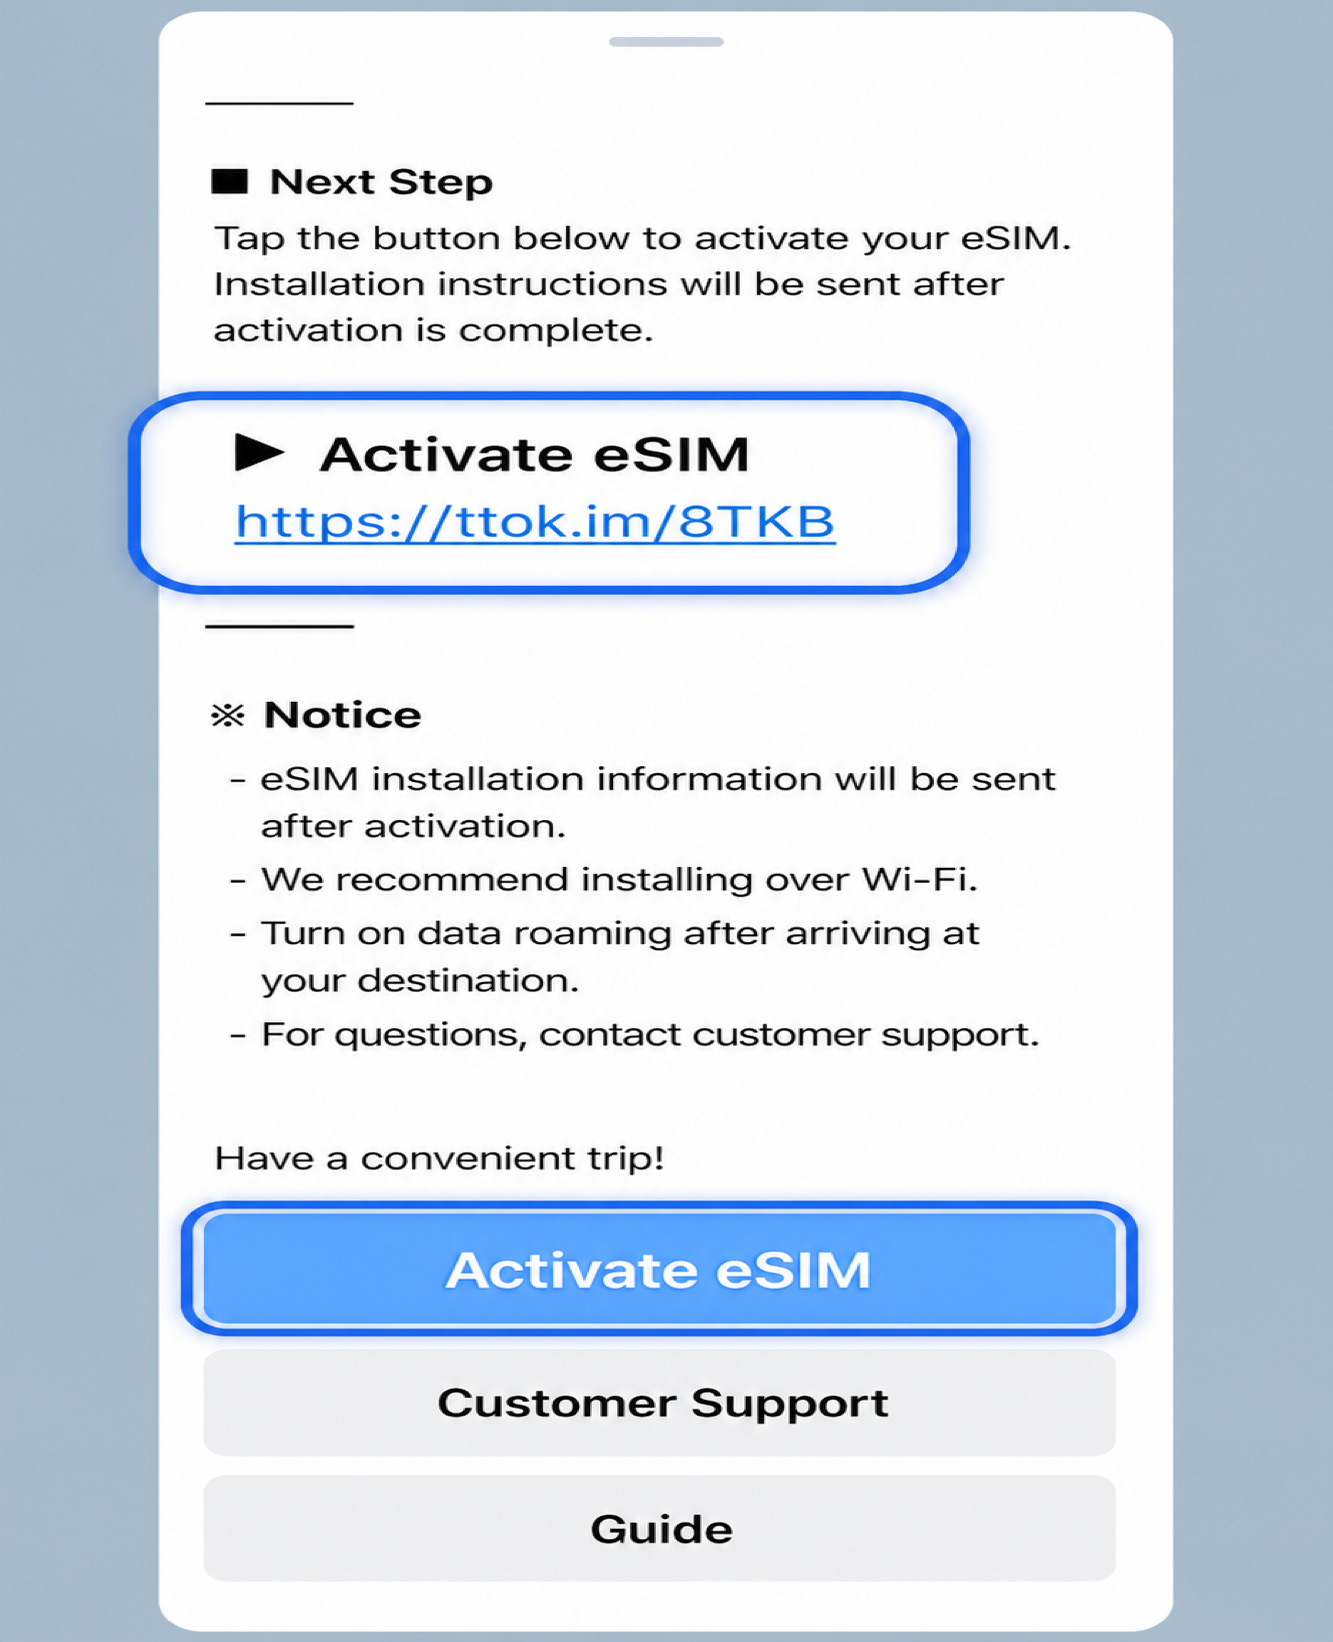
Open the activation link directly on your iPhone.
Step 2. Verify your phone number

Enter your phone number to verify.
Step 3. Confirm installation
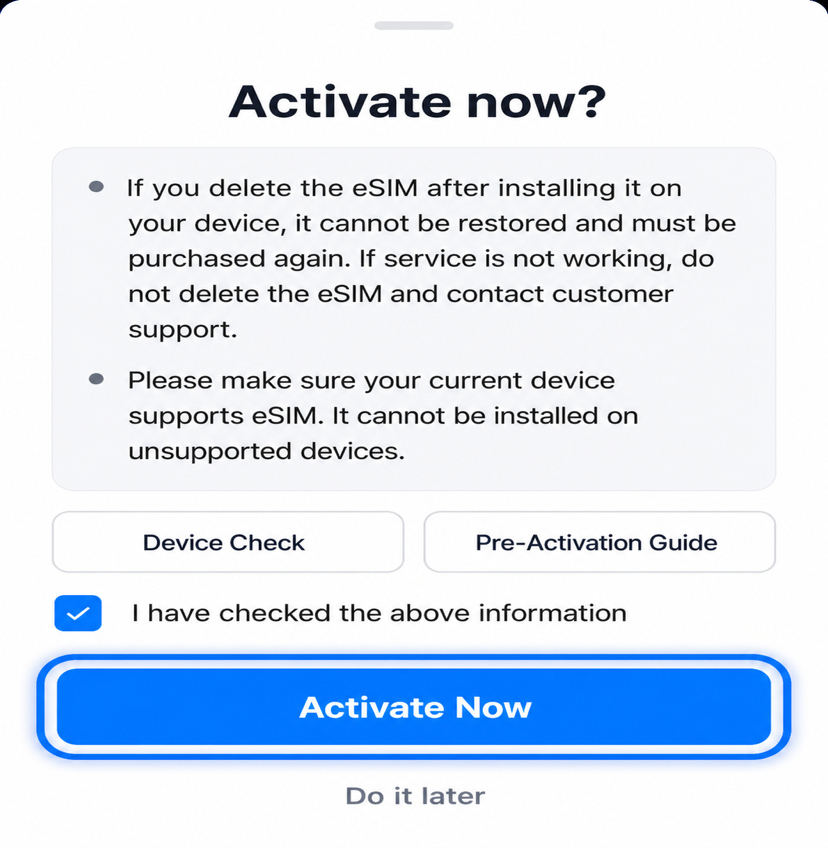
iPhone automatically downloads the eSIM profile.
Method 2. Auto-Install (iOS 16.4+)
Step 1. Receive auto-install prompt
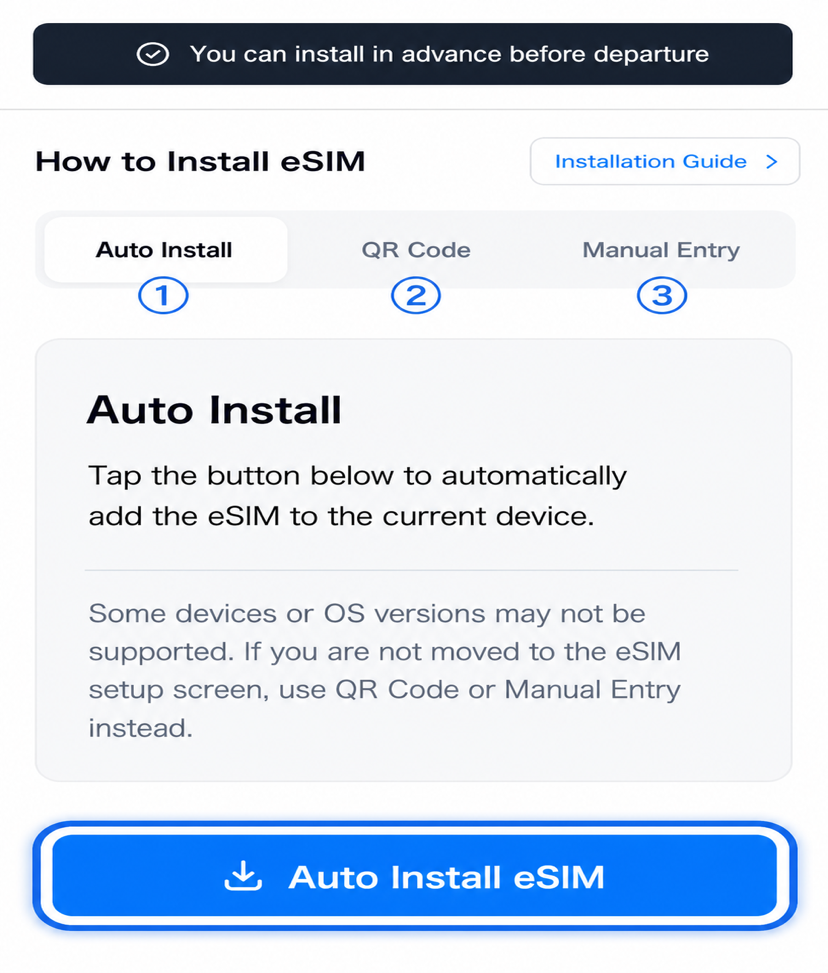
iPhone shows an "eSIM Quick Install" notification automatically.
Step 2. Allow the prompt
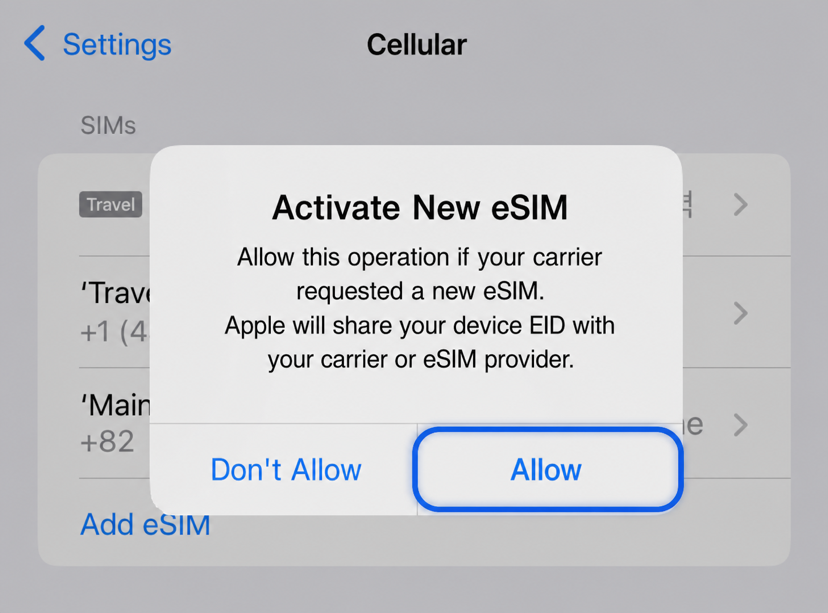
Tap Allow to grant install permission.
Step 3. Installation complete
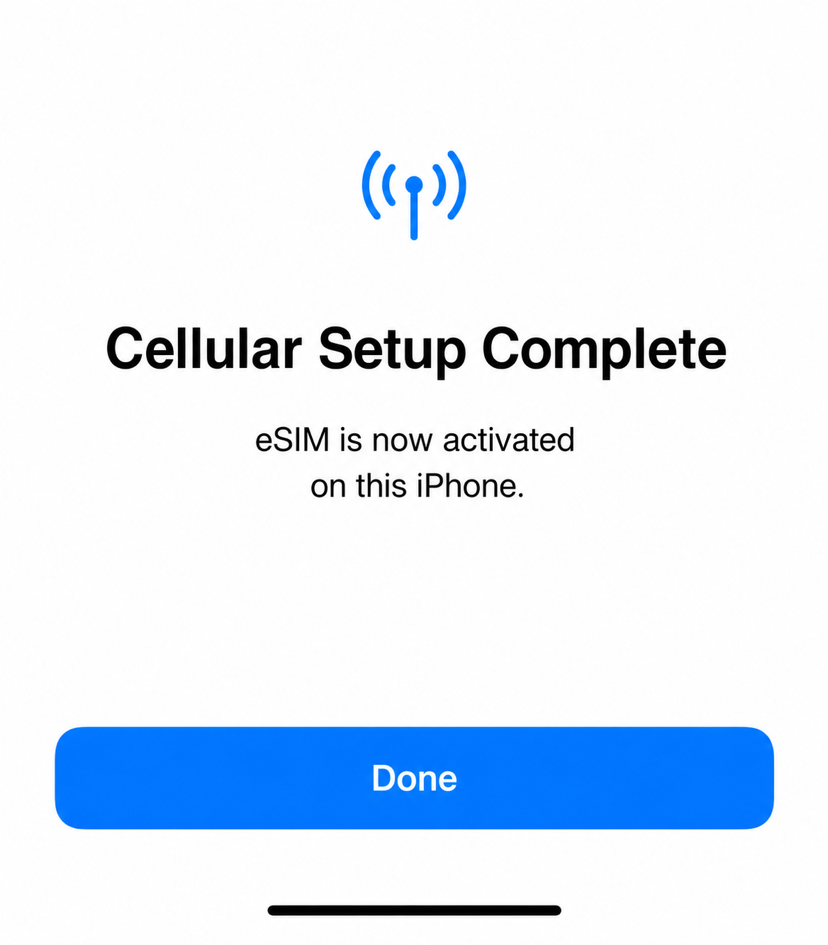
Label the line as "Travel" or similar to finish.
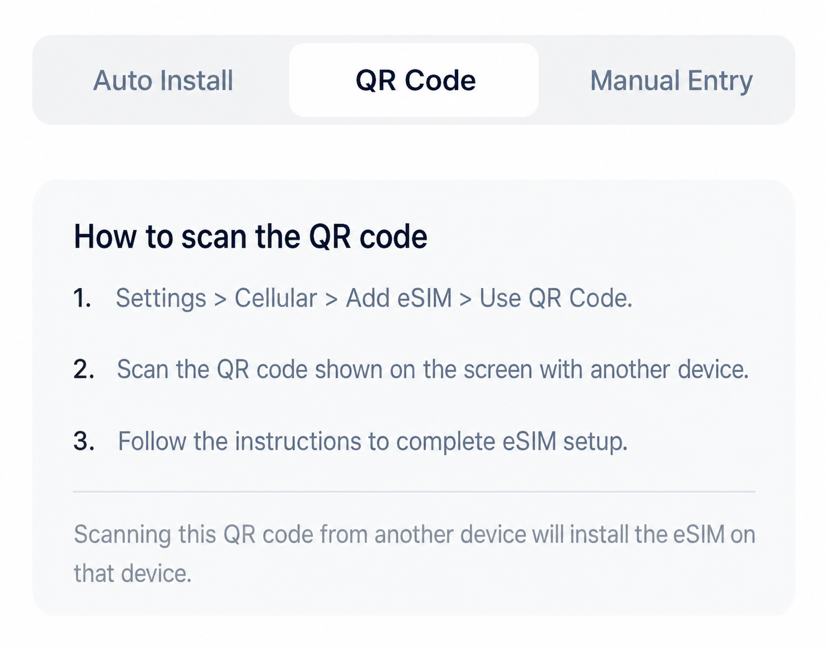
Method 3. QR Code Scan
Step 1. Open your QR code
Display the QR code from your esimoa account page or email.
Step 2. Scan with iPhone
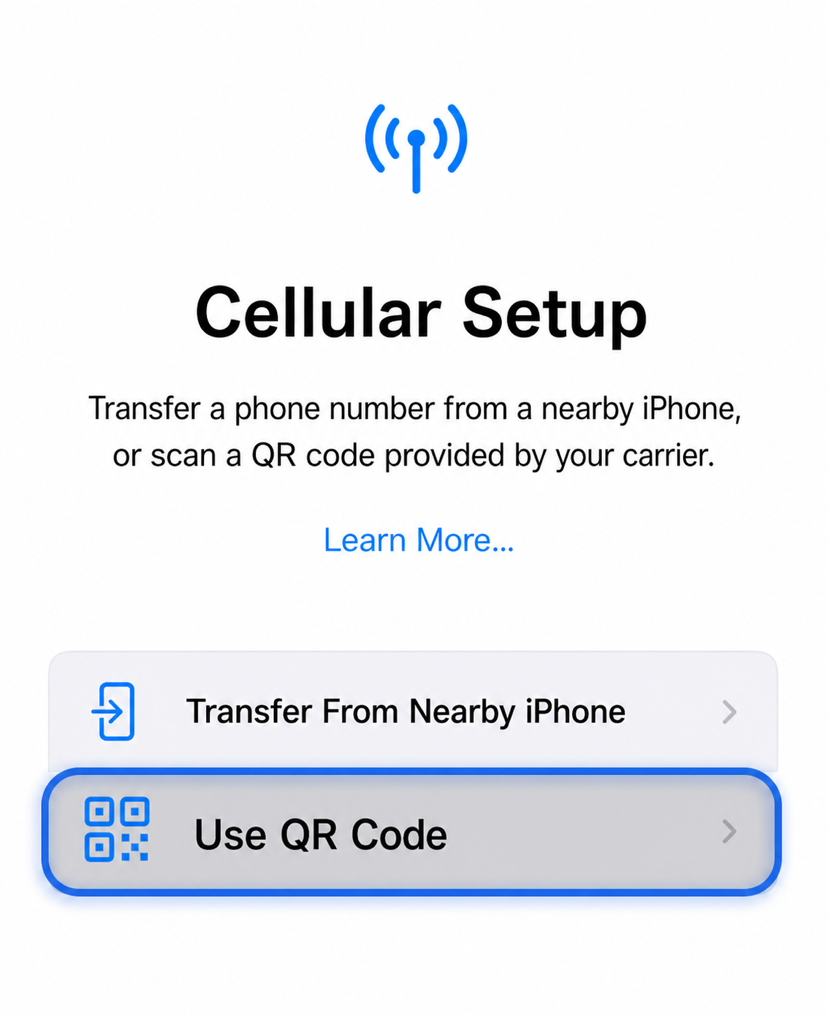
Go to Settings > Cellular > Add eSIM > Use QR Code and scan with the camera.
💡 The QR must be shown on another device's screen. Paper or photos may not work.
Method 4. Manual Entry
When QR scan fails, enter the SM-DP+ address and activation code directly.
Step 1. Note activation info
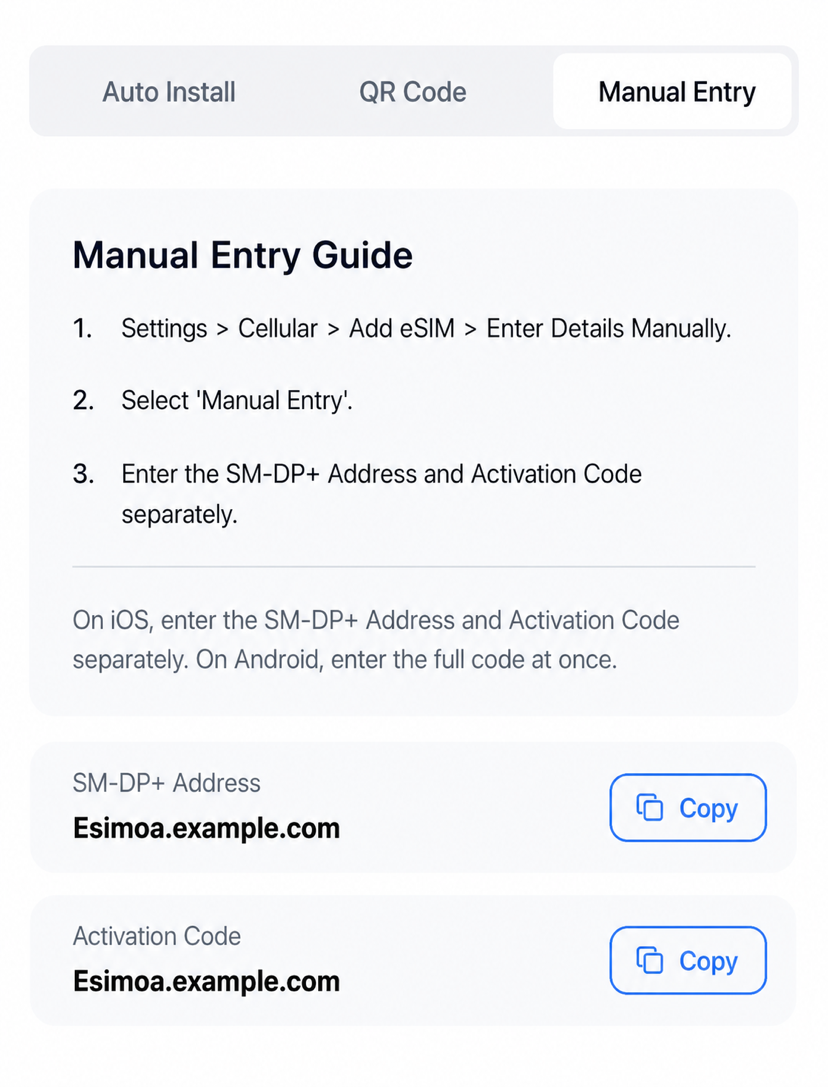
Copy the SM-DP+ address and activation code from esimoa's email.
Step 2. Open manual entry
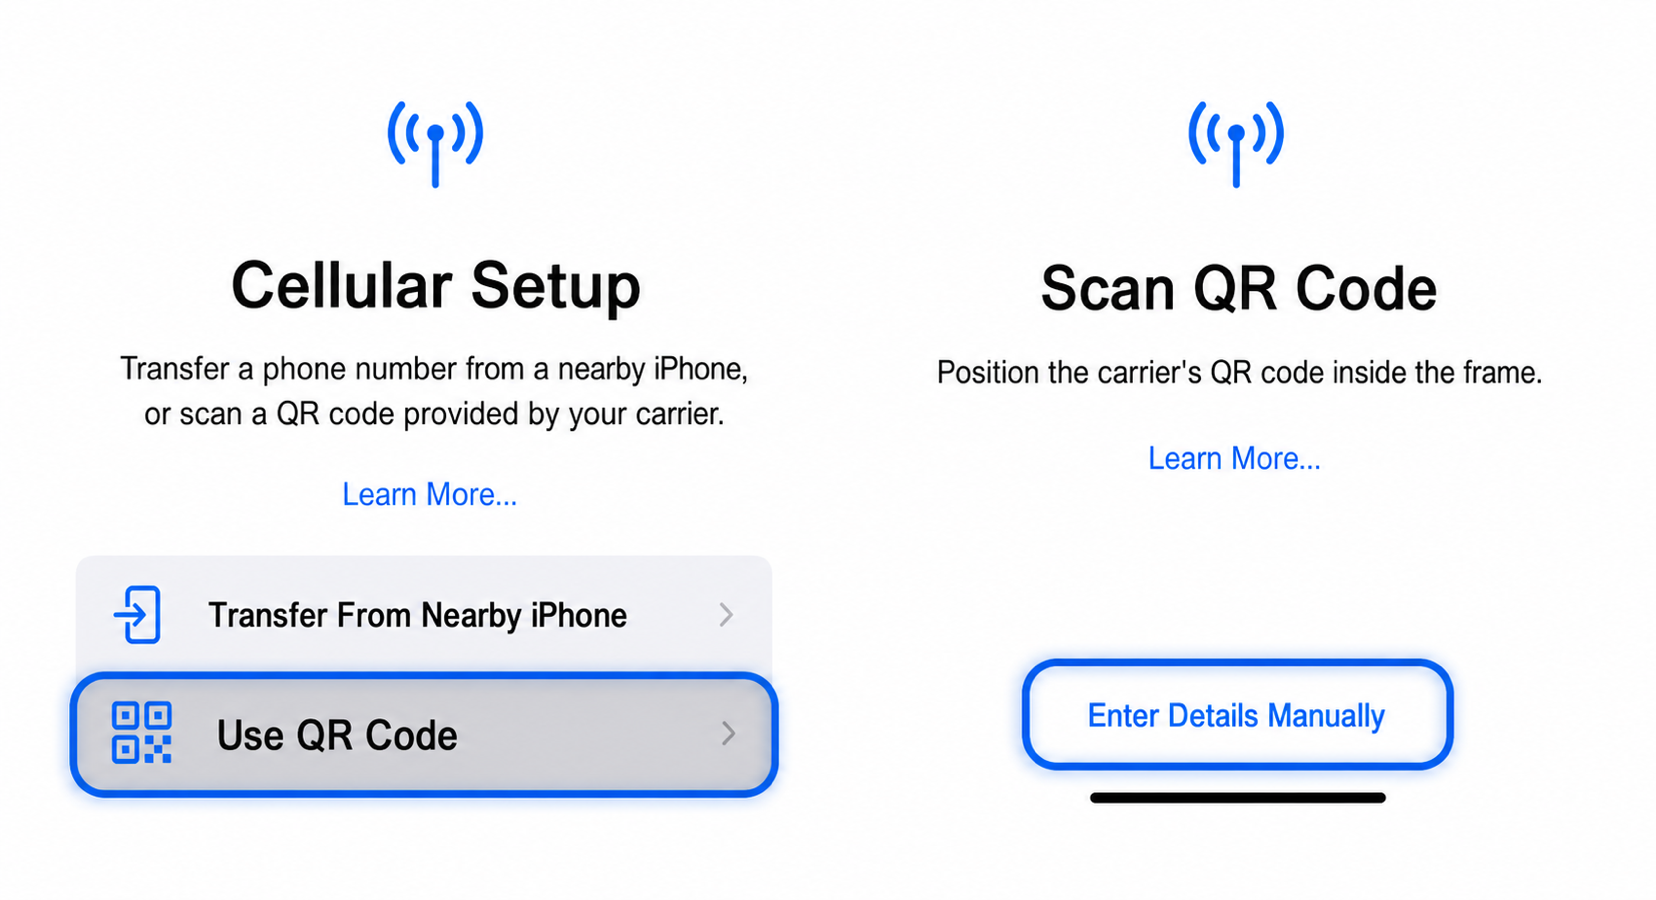
Choose Settings > Cellular > Add eSIM > Enter Details Manually.
Step 3. Enter the info

Enter the SM-DP+ address and activation code, then tap Continue.
Line Configuration After Install

- Line label: Use "Travel" or "esimoa" to avoid confusion.
- Default line: Voice on your Korean SIM, data on the eSIM is recommended.
- iMessage / FaceTime: Usually keep on the Korean SIM.
Next Steps
After installation, follow the After Arrival guide to enable data roaming abroad.
If you encounter issues, check iOS Troubleshooting or contact support.